Ever wondered how to transform simple ingredients into irresistibly cute Japanese ohagi?
From choosing the perfect rice to mastering the art of shaping and decorating, there’s a magical journey awaiting those eager to dive into the world of ohagi creation.
With each step offering a new layer of sweetness and creativity, this delightful process is sure to captivate your taste buds and artistic flair.
So, are you ready to embark on a whimsical culinary adventure that promises to elevate your dessert game to new heights?
Key Takeaways
- Select high-quality ingredients and explore flavor combinations for delicious ohagi.
- Shape ohagi creatively and present them attractively for a charming look.
- Experiment with toppings and decorations to enhance the visual appeal and taste of ohagi.
- Infuse traditional fillings and explore unique flavors for a delightful ohagi experience.
Choosing the Perfect Ohagi Ingredients
When creating the perfect ohagi, selecting high-quality ingredients is essential for a delicious outcome. Exploring flavor combinations can elevate the taste experience, making each bite a delightful adventure. Ingredient sourcing techniques play a crucial role in ensuring the freshness and authenticity of the flavors.
Imagine the rich sweetness of red bean paste, the nutty aroma of sesame seeds, or the subtle bitterness of matcha powder harmonizing perfectly with the sticky rice. By carefully choosing each component, from the rice to the fillings, one can create a symphony of flavors that dance on the taste buds. Whether opting for traditional pairings or daring fusions, the key lies in the quality and balance of the ingredients.
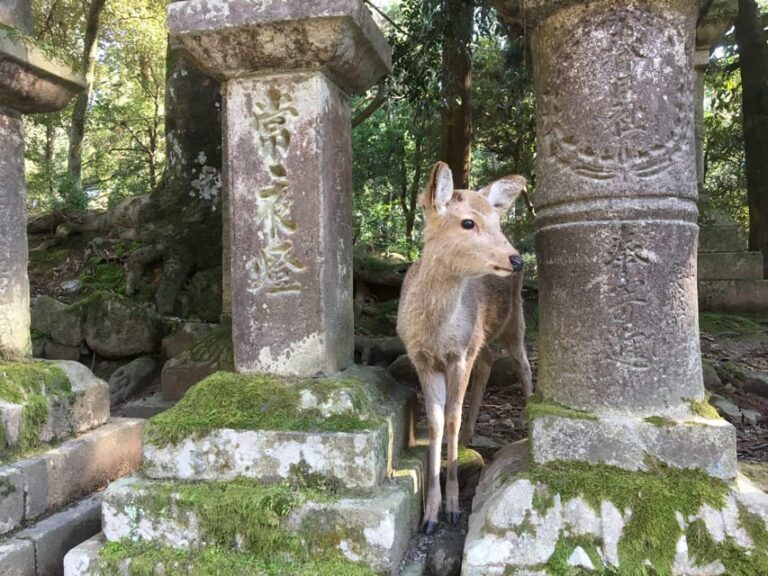
Planning more time in Nara? We've covered other experiences worth considering.
Preparing the Sweet Rice Balls
To kickstart the process of creating the delectable ohagi, begin by soaking the sweet rice overnight to achieve the perfect sticky consistency. Exploring flavor is essential in this step to ensure the rice absorbs just the right amount of sweetness.
The cultural significance of this preparation method adds depth to the tradition of making ohagi, connecting you to centuries of Japanese culinary heritage. Here are some key points to consider:
- Soak the sweet rice overnight for optimal stickiness
- Adjust sweetness levels to your preference
- Use high-quality ingredients for an authentic taste
- Mix in a touch of salt to enhance the overall flavor profile
These simple steps lay the foundation for crafting the perfect sweet rice balls that will later be transformed into delightful ohagi treats.
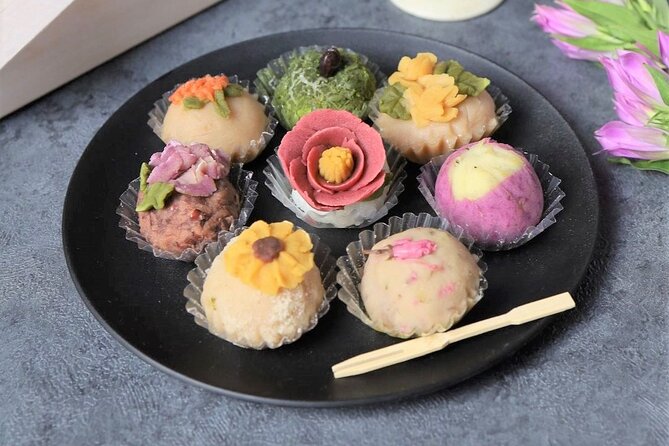
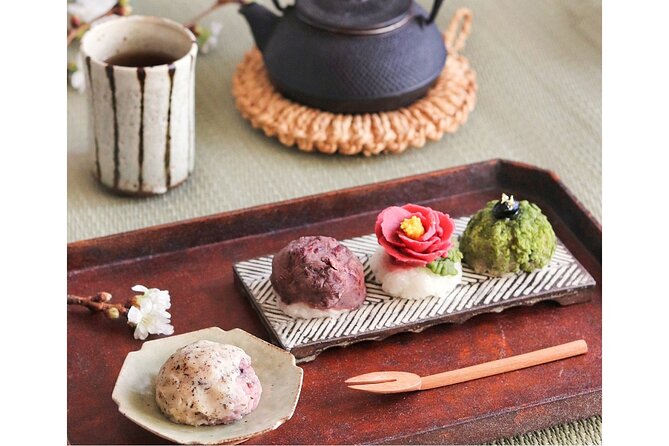
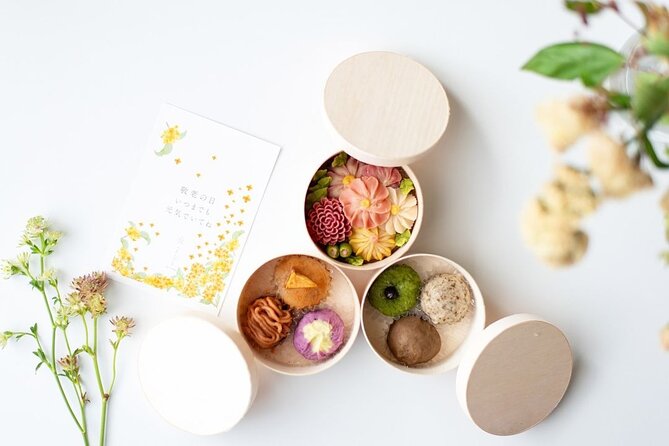
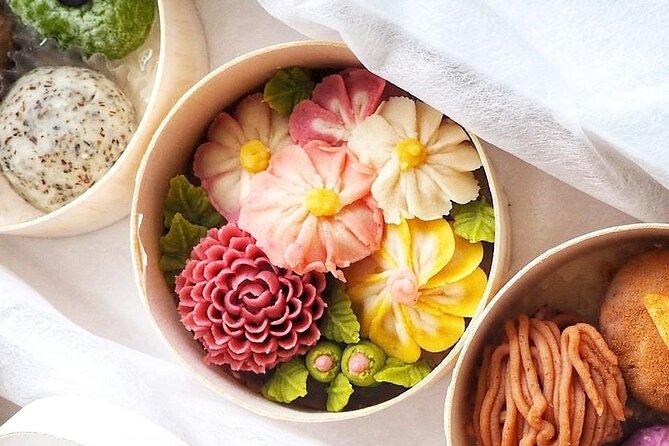
Crafting the Adorable Ohagi Shapes
Craft adorable shapes for your ohagi by gently molding the sweet rice balls into charming and delightful forms. When shaping ohagi, try traditional techniques like forming them into small rounds or flattening them into oval shapes.
For a fun twist, experiment with heart shapes or even animal designs like bears or rabbits. These ohagi shaping techniques can give your desserts a playful and creative look.
When presenting your ohagi, consider arranging them in a bento box for a cute and organized display. You could also place them on decorative plates or wrap them individually in colorful paper for a lovely gift idea.
Get creative with your ohagi presentation ideas to make them even more irresistible!
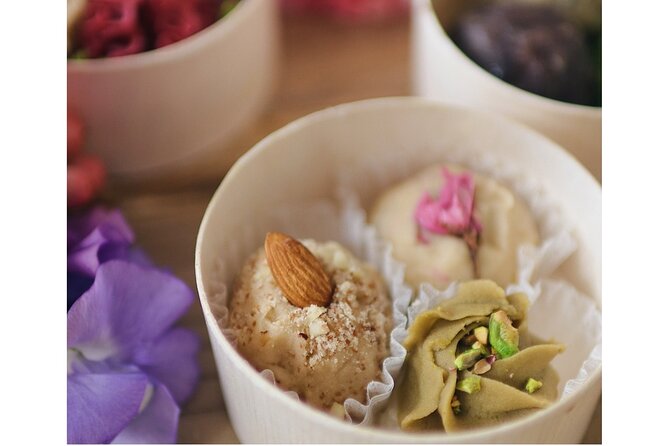
Decorating With Delightful Toppings
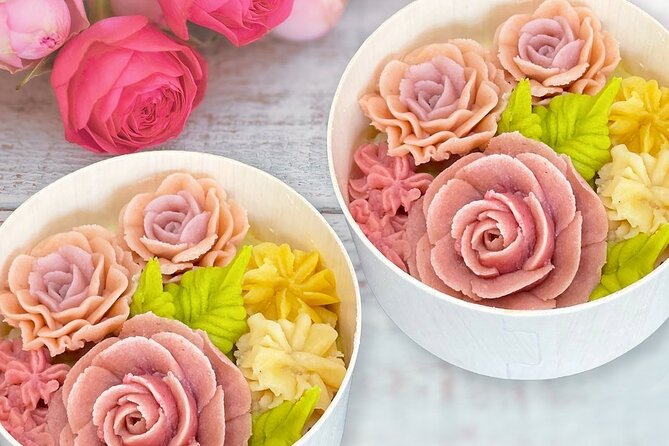
With a sprinkle of creativity and a dash of imagination, transform your ohagi into delightful masterpieces using an array of charming toppings. Here are some tips to make your ohagi visually appealing and bursting with flavor:
-
Topping creativity: Experiment with different toppings like matcha powder, edible flowers, toasted sesame seeds, or crushed nuts for a unique touch.
-
Presentation techniques: Play with presentation by arranging toppings in patterns or creating mini edible designs on the ohagi.
-
Flavor balance: Balance the sweetness of the ohagi by adding toppings that bring contrasting flavors like a sprinkle of sea salt or a drizzle of citrus zest.
-
Colorful decorations: Use colorful toppings such as dried fruit, chocolate shavings, or colorful sprinkles to make your ohagi visually enticing.
Let your imagination run wild and have fun decorating your ohagi!
Enhancing Flavor With Traditional Fillings
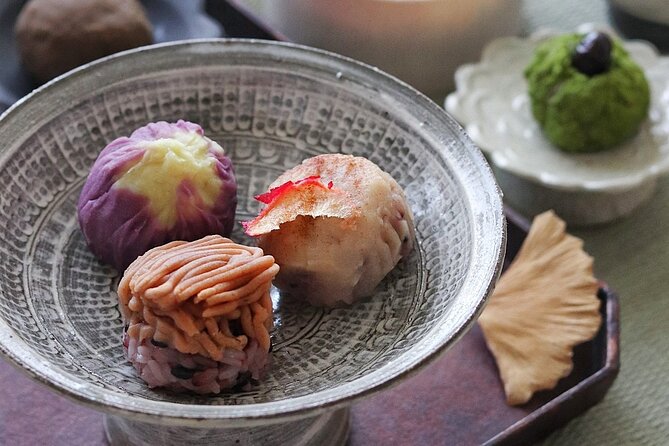
Transforming your ohagi into delectable treats involves infusing traditional fillings that enhance its flavors. When it comes to enhancing the flavor of ohagi, exploring regional variations can add an exciting twist to this beloved dessert. Each region in Japan offers unique fillings that can take your ohagi to the next level. Additionally, considering ohagi pairing suggestions can elevate the overall taste experience. Here is a handy table to guide you through some traditional fillings and pairing ideas:
| Traditional Fillings | Pairing Suggestions |
|---|---|
| Red Bean Paste | Green Tea |
| Mashed Sweet Potato | Black Sesame Seeds |
| Kinako (Roasted Soybean Flour) | Hojicha (Roasted Green Tea) |
| Chestnut Paste | Matcha Latte |
Serving and Presentation Tips
For an eye-catching and delightful presentation, consider arranging your ohagi in a circular pattern on a traditional Japanese serving plate. To enhance the visual appeal and make your ohagi even more adorable, here are some tips:
-
Colorful garnishes: Add a pop of color with fresh fruits like strawberries or edible flowers.
-
Creative plating: Experiment with different plating techniques such as using decorative molds or arranging the ohagi in a unique pattern.
-
Cute packaging: Consider serving individual ohagi in small, cute bento boxes or wrapping them in colorful paper.
-
Festive arrangements: For special occasions, arrange your ohagi on a beautiful platter with seasonal decorations like cherry blossoms or autumn leaves.
Capturing Ohagi Moments With Photography
To capture the delightful essence of your ohagi experience, snap candid photos of your adorable creations amidst vibrant garnishes and charming plating arrangements. When taking photos, consider natural lighting to enhance the ohagi aesthetics.
Close-up shots can showcase the texture of the sweet rice and filling, while incorporating the surroundings can add depth to your ohagi memories. Experiment with different angles and perspectives to find the perfect shot that highlights the beauty of your ohagi dessert.
Don’t forget to include styling ideas like using props such as traditional Japanese teacups or wooden chopsticks to complement your ohagi. With these photography tips, you’ll be able to preserve your ohagi moments in a visually stunning way.
Customizing Your Ohagi Experience
Customize your ohagi experience by selecting from a variety of dessert options and adding personalized touches to make it uniquely yours. Whether you want to explore traditional flavor combinations or experiment with modern presentation styles, there are endless ways to tailor your ohagi adventure.
Dive into the cultural significance of ohagi by trying out seasonal variations that capture the essence of each season. Spice things up with unique toppings or fillings to add your own twist to this classic Japanese treat. From cherry blossoms to matcha-infused ohagi, let your creativity run wild and create a one-of-a-kind ohagi experience that reflects your personality and taste preferences.
Frequently Asked Questions
Can I Bring My Own Ingredients to the Ohagi Making Experience?
No, participants cannot bring their own ingredients to the ohagi making experience. Ingredient preferences are accommodated within the provided options. Group dynamics are enhanced by sharing the same ingredients for a cohesive learning experience.
Is There a Minimum Age Requirement to Participate in the Ohagi Making Class?
There is no minimum age requirement to join the ohagi making class. The class size can vary, offering an intimate learning experience. Participants of all ages can enjoy creating these delicious Japanese treats in a fun environment.
Are There Any Restrictions on the Number of People Allowed in a Group for the Ohagi Making Session?
Group size for the ohagi making session is flexible, but reservations are recommended to ensure availability. The reservation policy allows for small to medium-sized groups to enjoy the experience together, creating sweet memories.
How Far in Advance Should I Book the Ohagi Making Experience?
When considering the ohagi making experience, it’s wise to book in advance for preferred slots. The booking timeline varies based on availability, but scheduling flexibility allows for group dynamics. Preparation tips enhance the overall experience.
Can I Request a Specific Ohagi Shape or Design During the Class?
Yes, participants can request custom shapes and personalized designs during the ohagi making class. This allows for creativity and a unique touch to their dessert. The instructor will guide them through the process with enthusiasm and expertise.
How to Make Japanese Adorable Ohagi
Conclusion
In conclusion, making Japanese adorable ohagi is a fun and tasty way to explore the world of Japanese cuisine.
With the right ingredients, techniques, and creativity, you can craft your own unique ohagi creations that are as cute as they’re delicious.
So gather your friends, have some fun in the kitchen, and create memories that will last a lifetime with this oh-so-adorable dessert experience!
More Tour Reviews in Nara
More Nara experiences we've covered
- E-Bike Nara Highlights – Todaiji, Knives, Deer, Shrine
- Nara: City Highlights Shared Group or Private Bike Tour
- Nara – Craft Beer, Sake, and Food Walking Tour
- Nara and Kyoto Customized Tour
- Nara and Kyoto Tour
- Nara: Nara Park Private Family Bike Tour With Lunch
- Nara: Cultural Heritage Tour by Rickshaw
- Katsuragi: Unique Sumo Experience
- Nara: Heart of Nature Temple, Forest, & Waterfall Bike Tour
- Nara’s Historical Wonders: A Journey Through Time and Nature
- Immersive Experience Tour in Totsukawa Village
- Nara: Private Guided Tour